Went out to test and sight in a new scope. Got a BSA Platinum MD 6-24x44. I love this scope and picked it up for only $60!
Date: 8/28/10
Time: 4:30 PM CDT
Location: McLeansboro, Illinois
Temp: 85 F
Humidty: 80%
Winds: Light
Bullet: IMI 62 Gr M855
Rounds: 80
Ranges: 50 yd
Configuration Changes: BSA Platinum MD 6-24x44 Scope
Summary: Loved the scope first off... couldn't have asked for more for $60! Has four mil-dots per line with elevation and windage adustments at 1/8" per click!
However, I'm still a little concerned about the gun. The groupings are still all over the place even when I had it sandbagged... posted a comment on AR15.com to see what the experts think...
Sunday, August 29, 2010
Tuesday, July 6, 2010
Range Report 2
After the last time at the range, I decided this time to use a heavier 62 grain bullet from IMI (M855). Also, to clear up the bolt cycling issue, it was recommended to use Break Free CLP, so the bolt is well covered in it.
Date: 7/4/10
Time: 6:30 PM CDT
Location: McLeansboro, Illinois
Temp: 88 F
Humidty: 75%
Winds: Light
Bullet: IMI 62 Gr M855
Rounds: 50
Ranges: 25 yd, 50 yd, 100 yd
Configuration Changes: None
Summary: Much better than the first time out. This time, I had some nice groupings at 100 yds after zeroing the scope at 25 yd then 50 yd. Tried the gun in the prone position and had no trouble hitting the bullseye. The last 10 rounds, I put the gun under my arm and pulled the trigger as fast as I could... and loved it!!!
Range Report 1
Well, this is my first range report. Took the gun out to the 100 yd range near McLeansboro, Illinois to give it its first break-in. For each range report, I'll try to list the date, time, environmental conditions (temp, wind, etc), the type of bullet I'm using, any configuration changes to the gun, and a breif summary of the outcome.
Date: 6/27/10
Time: ???
Location: McLeansboro, Illinois
Temp: 92 F
Humidty: 90%
Winds: Light
Bullet: PMC 55 Gr FMJ-BT
Rounds: 90
Ranges: 50 yd, 100 yd
Configuration Changes: None
Summary: Overall, it went well. The bolt had trouble cycling completely for the first 20 rounds or so, but loosened up nice after that and I had no issues. The scope was WAY off and needs to be zeroed, but I knew it wasn't going to be accurate with 55 grain bullets through a 1:7" twist rifle. Otherwise, had a great time shooting it and looking forward to putting a lot of lead down range with this gun.
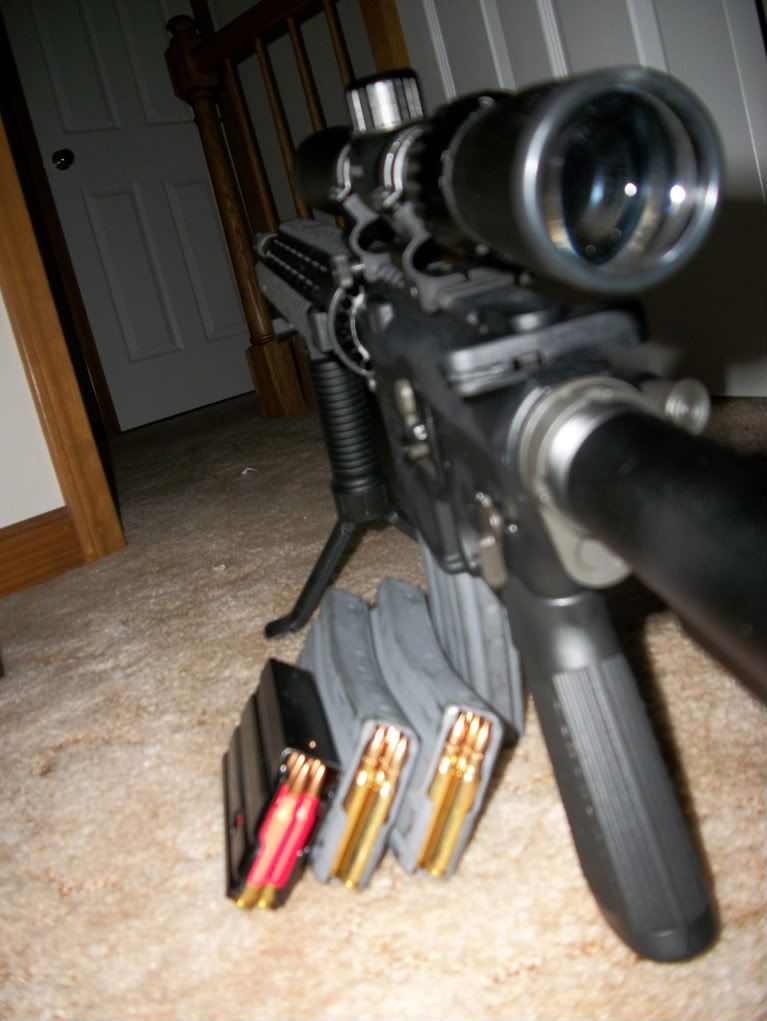
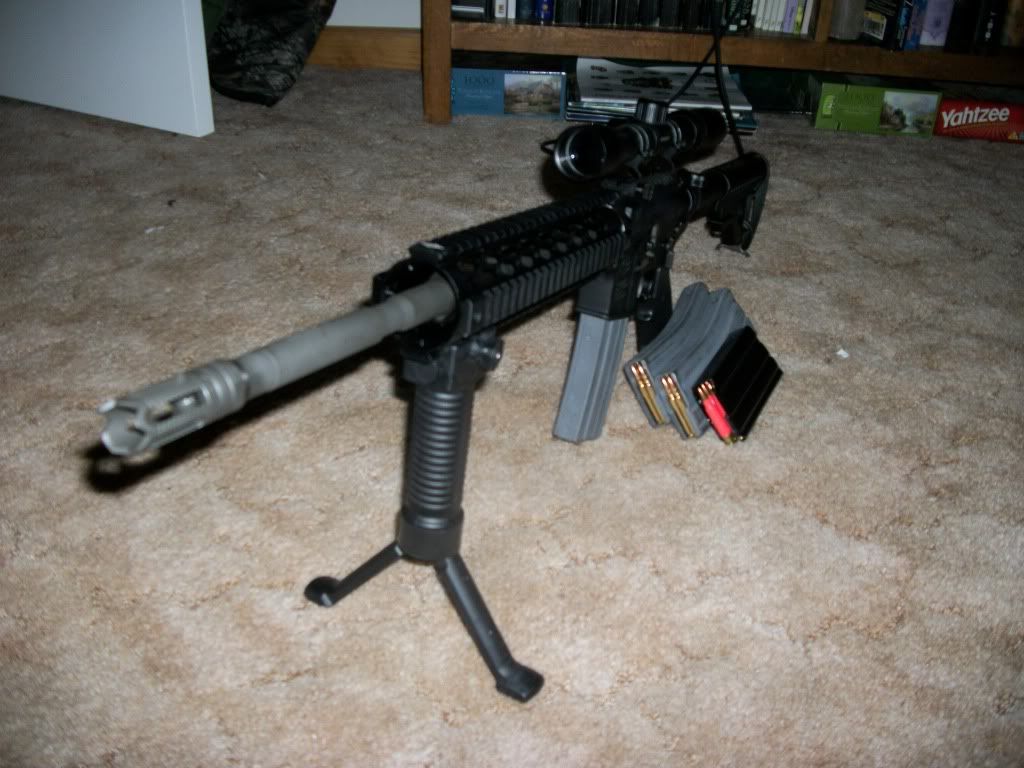
Gun Complete (Well... sorta)
As the title suggests, the gun is complete... but not complete. I've recieved and placed the last parts required to get the gun in a firing configuration, but there are still parts I want to buy for it. So, below are some pics of the finished gun.


What I still need is the following:
Red Dot optic (looking at a holigraphic Red Dot)
Flip Up Sights
Sling
The scope that I have on there is a cheapo from my Deer Slug Gun (which it will need back for Deer Season). The Forend grip that converts into a bi-pod is courtesy of my brother who gave this to me off of his M-4 that he used in Afghanistan.
I will start posting range reports once I get the gun shooting.
Thanks!
Mike
Tuesday, March 23, 2010
Reloading
Nothing new to add to the gun today, but I thought I would add something that I've been thinking over about and have come to a decision on. Everywhere I read (especially on ARFCOM), its always talked about that the AR15 has quite an appetite. A few weeks ago, my father-in-law and I went out to the local range back in my home town and ran through about 150 rounds in around 20 minutes or so.
So, I've got two problems: One, I don't have a whole lot of money just laying around to buy up thousands of rounds per year to sate my AR thirst. Two, I'm a slight perfectionist when it comes to things I've built, so I don't want to just put any round in my gun. I want something that will be precise, accurate, and dependable.
After considering my dilemma, I've decided that I should just reload my own ammo.
I have to admit, when I first considered doing this, it seemed to me that reloading ammo was only for those hardcore gun enthusiasts that had spent their childhood sitting on daddy's lap while he field stripped his rifle. After doing some research, I realized even green guys like me could easily reload their own ammo!
Here's what I've found.
Going to Midway USA's website (http://www.midwayusa.com/), I found a Lee Pro 1000 Progressive Press Kit, 1 pound of Accurate 2520 Smokeless Powder, 500 count of Lapua Brass, 1200 count of Hornady AMax 75 Grain Boat Tail bullets, 1000 count of CCI Small Rifle Primers, along with a Lyman Case Length Gauge. All for around $705 including shipping/tax.
Ok, so first the reasoning behind my choices.
Lee Pro 1000 Progressive Press Kit: For the press kit, it was nice that it came with basically everything I needed to get started. Also, I really like the "supply line" style of the kit and it seems easy enough to opperate. The price is nice too... for my first go-round with this reloading business, I didn't want to break the bank only to figure out it wasn't for me. Price: $159.99 at Midway USA.
Lapua Brass: Everything I've read on this brass says it is top notch. The strict quality control on the brass makes it hard to beat even though it is more expensive. The nice aspect of the brass that helps offset the price is the ability to continually reload the brass with minimum trimming. Price: $279.99 at Midway USA.
Accurate 2520 Smokelss Power: Honestly, there is no real reason for picking this brand/type other than it was one of the more expensive per pound so I can get an idea on price. This will most likely change to another brand/type as I'm doing my research. Price: $18.99 at Midway USA.
Hornady AMax 75 Grain Bullets: I like the Hornady brand and wanted the heavier bullet since I'm planning on putting together a barrel with a 1 in 7 inch or a 1 in 8 inch twist. Price: $201.98 (for two boxes) at Midway USA.
CCI Small Rifle Primers: Read that these are the most stable in this press and of better quality than most. Other than that, nothing else to this one. Price: $31.99 at Midway USA.
So, after everything is said and done, I will be spending around $705 to get me started. I'm assuming the brass won't need to be trimmed (as I've heard of Lapua) and can be reloaded at least one time (this is obviously conservative).
For 1000 rounds, I'm spending around $0.70 per round including all of my one-time costs (Lee Pro Press). If I go onto Midway's website and buy a box of Hornady Varmint Express 55 Grain V-max (one of their CHEAPER boxes), it's still around $0.87 cents per round. Now, I know that I can go to places like Cheaper Than Dirt and buy ammo for around $0.40 per round, but like I said before, I want good, quality ammo that is dependable.
By reloading my own ammo, I have control over the quality. I can make each round nearly identical, which is extremely important when you are going for accuracy.
Below are some good sites for more information on reloading!
Step-By-Step Reloading Instructions (including lessons learned)
Good guide on reloading 223
Arguably the best resource on handloading
Sunday, March 14, 2010
Upper Assembly...
Well, I made it to the show today and grabbed my upper assembly. Bought it off of Pam and Tim with M&A. Very nice people and my father-in-law swears by them, so I trust their parts. The upper is an A3 Flattop Upper with port cover and forward assist already assembled. The machining ALMOST matched the machining on my lower. The right side of the upper where the ejection port contours meet the lower assembly are off just a little, but not big deal. It doesn't have to be pretty to work correctly. Below is a pic of the upper and lower assembled.

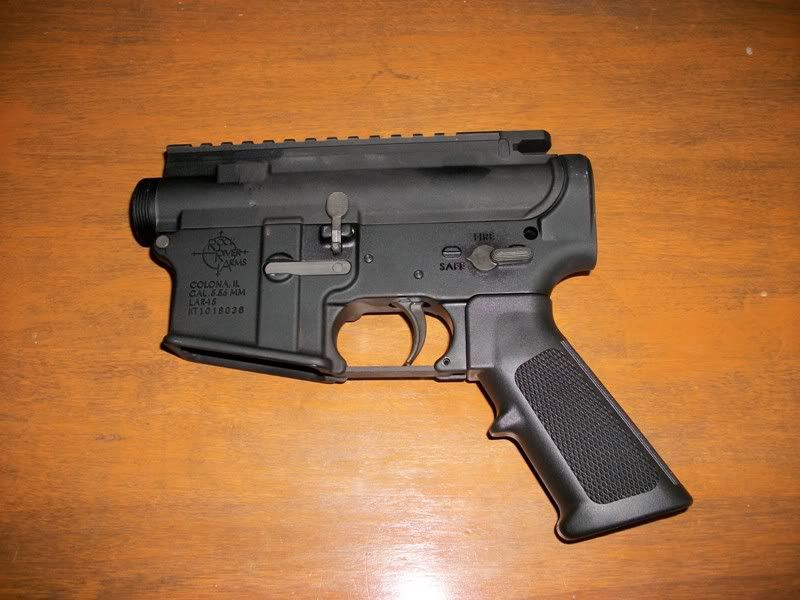
Now, I need the stock, bolt carrier group, charging handle, and barrel and I'll have a completely opperational rifle! It will probably be sometime before I aquire these items, so my next update might now be for a while unless I feel like posting something else!
Mike
Tuesday, March 9, 2010
Lower Built (Minus Stock)
So, Sunday I went to the gun show and bought the lower parts kit... of course, I couldn't wait to get home to start building!
I used the book "The AR-15 Complete Assembly Guide, Volume 2" by Walk Kuleck and Clint McKee as my guide. Another good guide is on the AR15.com website, but my printer is down at the moment and I didn't feel like carrying my laptop down to the basement.
After everything was said and done, it took me around an hour to assemble the entire lower. I'll not go through each step, but I will give you what I've learned.
First off... if you buy a lower parts kit, print out a nice detailed schematic of the lower and all of the parts. The schematic that came with my parts kit was pretty much useless and the details in the book left it hard to figure out exactly which pin/spring they were talking about. I used the DPMS lower parts kit, so I would recommend going to their website and printing off nice color photos of each part with a description.
Second... make sure you have a good set of STEEL pins... brass pins work... but the smaller diameter ones can bend easily.
Third... get the lower receiver block... this thing was absolutely priceless when putting these parts together... its a lot easier to drive in pins when the receiver is secured to the block.
I think that's it for now... I'll go to the gun show next weekend and see about getting my stock... then the lower will be complete and I can move on to the upper. I'll had pics later on of the lower as it is now.
Here's some pics of my lower as of now...


Mike
Collinsville, IL Gun Show
So this past weekend I went to the gun show at the Gateway Convention Center in Collinsville, IL. I had never actually been to one of these before, but I received a lot of good advice on the show from AR15.com. Found that I could have actually purchased everything I needed and spend at or less that expected on each part! However, since my wife controls the budget, I had $200 cash on me to spend. I think I spent it wisely.
Since this is my first build, I didn't have any of the tools. So, I picked up the DPMS Upper Receiver Block, a lower receiver block, a punch set with a decent punch, and some Hoppes #9 lubricant.
I also picked up the DPMS Lower Parts Kit (this is backordered online so I was really excited to find it), a Colt .223 Magazine just to have and for testing out my lower, and a surplus 7.62mm ammo box to keep my stuff in. All-in-all, I spent around $160 for everything (my wife was suprised that I actually came home with extra cash!)
Ok, so some lessons learned...
First off, don't go into the show and immediately buy the first thing you see that's on your list... I went to the show the third day (Sunday) and there was still plenty of stuff... start at one end and work your way through making a mental list of parts you need and where they are at. For example, a guy right at the entrance was selling the DPMS Parts Kit for $60, but I found another guy in the back selling the same kit for $55. Now, $5 might not be much, but it can add up...
Secondly, if you're new to this, bring a catalog from a reputable source with you for reference. Since I didn't know the prices off hand, I brought a Midway USA catalog with me. They might not like the fact that you're checking their prices, but that's just tough...
Thirdly, DO YOUR HOMEWORK... if you go in there acting like you have no idea what you're doing, you will be eaten alive! I made sure to do my homework so that when I was talking about a part, I made it seem like I've built dozens of these...
I've got another show to go to next weekend, so I'll see if I can grab the stock I want there!
Mike
Welcome to my AR 15 Blog
As the title suggests, this blog is about myself and my experiences with the AR 15. Currently, my experience is extremely limited, but I'm hoping to improve on that.
A little background...
As mentioned in the "About Me" section on the right side of this page, I'm currently employed as an Aviation Engineer near the Saint Louis, MO area for a Business Jet Completion Center. Basically, my company custom designs the interior of narrow body jets for corporations and people who have way to much money. So, I decided to custom build my own little toy so I can have a minuscule piece of what our customers experience.
My firearms experience is pretty limited so far... I'm almost 30, but I've only been around firearms for the last 5 years or so. I got hooked when my wife's (then girlfriend) cousin offered me to go deer hunting on his property. I had to confess that I've never been hunting, didn't own a gun, nor had I ever shot a shotgun before (I had VERY limited experience with .22 Rifles).
So, he gave me everything... gun, ammo, a place to hunt... and the first time I pull a trigger on a shotgun, I bag a 13 point buck (if you want the whole story, let me know and I'll post pics as well). Needless to say, I was hooked.
Here's a pic of the mounted head... hard to stop after this one...

Now, I own a Mossberg 500 slug gun for deer hunting, a Remington 700 30-06 Rifle (passed down from my late grandfather), a Remington 870 Wingmaster 20-Ga Shotgun, and an old Thompson-Center 50 Cal Muzzel loader. However, none of these guns were purchased by me as they were all gifted to me. Not that I'm complaining, but I wanted have a gun that I purchased.
Here's my little collection as of now...

Now, comes the AR-15... I went to a friends house where he had set up a really nice rifle range. All of the targets were NRA regulation targets made from 3/4" hardened steel ranging between 50 and 1000 meters. He has shoots out at his house where usually 30-40 people show up for a really good time. One of the guys that showed up brought a custom-made AR-15 in a Carbine configuration. He let people shoot it and after putting 30 quick rounds down-range, I was hooked.
As I mentioned before, I'm an engineer... so of course I want to build one. My father-in-law has put more of the AR's together than he can count (and even if he could, he wouldn't tell me the number)... so he's helped to get me started...
So, on here, I'll try to document as much of the build and overall experience that I get from my AR. I'll post pitfalls, traps, and lessons learned which will hopefully help someone else out there wanting to do the same thing.
For those new to the gun, check out my links section as it has a lot of good resources available that will help with your build and overall knowledge of the gun.
Enjoy!
Mike
Subscribe to:
Comments (Atom)